
Tools
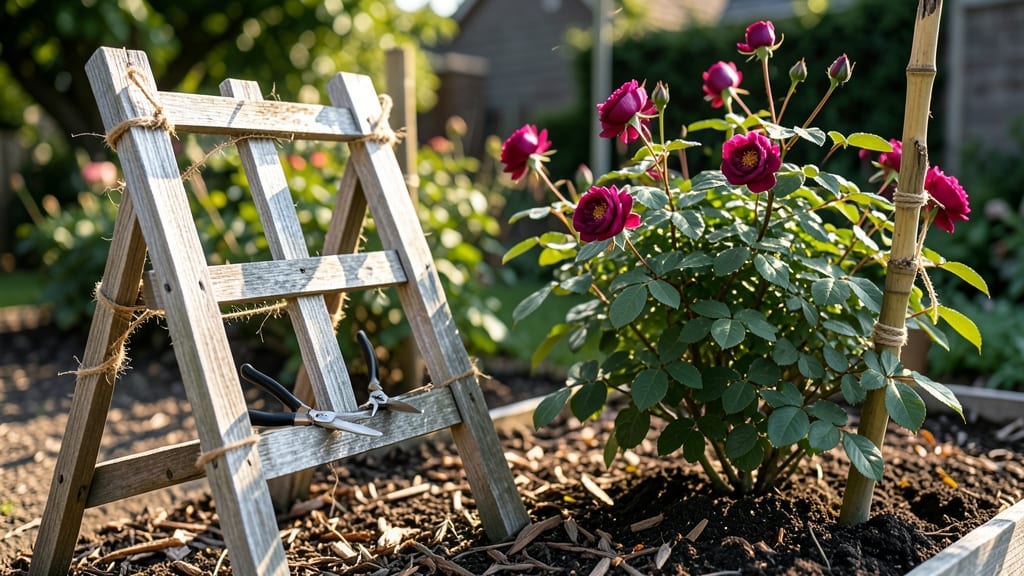
Building a rose bush trellis transforms your climbing roses from sprawling vines into a showstopping vertical display—and it’s easier than you think. ✨ I’ve spent years testing different designs, and the right trellis not only supports your roses but also elevates their fragrance and bloom visibility.
The key is matching the trellis to your rose variety (ramblers need height, floribundas prefer structure) while keeping it sturdy enough to handle years of growth.
You’ll need basic materials—wood, metal, or bamboo—depending on your garden’s style and durability needs. A 6-foot-tall frame with 3-inch spacing between supports works for most roses, but taller varieties like ‘New Dawn’ need 8-foot structures.
The secret? Using galvanized hardware to prevent rust and angled braces for extra stability. This isn’t just a support—it’s the backbone of your rose’s future elegance.
Once installed, your trellis will double your blooms’ impact by training vines upward, where they catch sunlight and breeze. You’ll notice fewer broken canes, healthier growth, and easier maintenance—no more wrestling with sprawling stems.
Plus, the vertical structure creates a natural privacy screen or focal point in your garden layout. Think of it as a custom rose display that grows with your plants.
Pro tip: Paint or stain your trellis before assembly to protect it from weather, and add trellis netting for extra support if you’re growing heavy blooms like ‘Double Delight.’
Whether you’re working with a small patio rose or a grand climber, this DIY project pays off in years of effortless beauty. Ready to build?
📚 In This Guide
- What you need
- Instructions
- Tips and common mistakes
- Wrapping up and next steps
What you need
- ● Trellis Base: 4 wooden posts (4x4 inches or 10x10 cm) – 8 feet (2.4 meters) tall
- ● OR 1 sturdy metal or PVC pipe (2-inch/5 cm diameter) – 8 feet (2.4 meters) long
- ● Trellis Framework: 1x2-inch (2.5x5 cm) wooden lattice panel – 4 feet (1.2 meters) wide x 8 feet (2.4 meters) tall
- ● OR 1-inch (2.5 cm) diameter metal or wooden dowels – 10-12 pieces, 4 feet (1.2 meters) long
- ● Fasteners: Galvanized screws or nails (2-inch/5 cm) – 20-30 pieces
- ● Heavy-duty staples (if using lattice fabric) – 1 box
- ● Anchoring: Concrete mix (for wooden posts) – 2 bags (80 lbs/36 kg total)
- ● Measuring tape
- ● Level
- ● Drill or hammer
- ● Saw (hand saw or circular saw)
- ○ Post hole digger (optional but helpful)
- ● Safety gloves and goggles
- ● Decorative lattice fabric or bamboo slats for a rustic look
- ● Paint or stain (weather-resistant) to match your garden décor
- ● Cable ties or zip ties for securing flexible materials
- ● Trellis kits (pre-made lattice panels for convenience)
Step-by-Step instructions for building a rose bush trellis
Here's my go-to method for crafting a trellis that supports climbing roses while keeping the structure elegant and functional.
🪴 Step 1: Design and Gather Materials
Sketch a simple design first—most climbing roses thrive with a 4-6 foot tall trellis that fans out slightly at the top. I use 4 wooden stakes (4 feet long) and 3 horizontal slats (3 feet long) for a sturdy base. For a more decorative look, opt for wrought iron or bamboo instead of wood. Measure your rose bush's mature spread (usually 3-5 feet wide) to determine spacing.
Gather 2-3 feet of wire or strong twine for tying, plus wood screws or metal brackets if using pre-cut materials. Avoid thin, flimsy materials—your trellis must support 10+ pounds of blooms without bending. I always add 1-2 extra stakes as backups in case of wind.
☀️ Step 2: Install Support Stakes
Drive the 4-foot stakes into the ground 12-18 inches deep, positioning them 2 feet apart in a square around your rose bush. Use a hammer or mallet to avoid damaging the roots. The stakes should lean slightly outward (about 5 degrees) to create a natural fan shape when connected. For heavy clay soil, pre-drill holes to prevent splitting.
Check stability by gently pushing each stake—it should not wobble. If using a pre-made trellis kit, follow the manufacturer's stake depth guidelines. The deeper the stakes, the more wind-resistant your structure will be. I like to bury 1 foot below ground for maximum support.
✂️ Step 3: Assemble the Frame
Attach the 3-foot horizontal slats between the top of the stakes, spacing them 12-18 inches apart vertically. For wood, use galvanized screws (at least 2 inches long) to secure each slat. If using bamboo or metal, follow the manufacturer's joining instructions—some require zip ties or specialized connectors. The top slat should be 6 inches below the stake's full height to allow room for training canes.
For a curved trellis, bend flexible materials (like willow or young saplings) into an arch shape and secure with soft ties. Avoid tight knots that could damage the wood over time. Test the frame by pulling gently on each slat—no movement means it's ready for roses.
🌿 Step 4: Train Rose Canes to the Trellis
Once your rose bush produces new growth in spring, select the strongest, healthiest canes (about pencil-thick) to train upward. Tie them to the bottom slat first, using soft garden twine or velcro ties—never wire, which can cut into the stems. Space ties 6-8 inches apart as the cane grows. I like to use cotton twine because it stretches as the cane thickens.
Guide the canes upward in a spiral pattern around the trellis, securing them to each slat as they grow. Prune any side shoots that form below the first 12 inches to encourage upward growth. By mid-summer, your roses should be climbing freely—this prevents weak, sprawling canes that break under bloom weight.
💧 Step 5: Maintain and Reinforce
Check the trellis monthly for loose screws or sagging slats, especially after rain or wind. Tighten any connections and replace damaged materials immediately. In late winter, remove old canes and prune back new growth to 1/3 of the trellis height—this keeps the structure lightweight and prevents overcrowding. I also add mulch around the base to protect stakes from erosion.
For heavy bloomers like 'New Dawn' or 'Blaze', reinforce the top slat with an extra diagonal brace for extra support. Avoid overloading one side—distribute canes evenly to prevent tipping. With proper maintenance, your trellis will last 10+ years and give your roses the perfect climbing partner.
Tips & tricks for perfect rose bush trellis construction
The difference between a trellis that lasts and one that collapses under blooms comes down to these key details. I've built enough to know what works—and what doesn't.
Material Selection: Wood is my go-to for durability, but if you're going for a more decorative look, wrought iron or bamboo can be stunning. Just remember: the 4-foot stakes and 3-foot slats specified in Step 1 are critical for weight distribution. For heavy clay soil, I always switch to galvanized metal stakes—they resist rust and provide better stability when buried 1 foot deep as mentioned in Step 2. The extra cost is worth preventing a summer collapse under 10 pounds of blooms.
Stake Installation: That 5-degree outward lean in Step 2 isn't just for looks—it creates a natural fan shape that guides rose canes upward without resistance. I've learned the hard way that vertical stakes cause canes to grow in awkward angles. For extra wind resistance, I always position stakes in a square formation 2 feet apart and use a level tool to ensure they're perfectly plumb before driving them in. This prevents the trellis from developing a wobble that can snap under heavy blooms.
Frame Assembly: When attaching those 3-foot slats in Step 3, I recommend pre-drilling screw holes to prevent wood from splitting—especially important if you're using untreated lumber. For curved trellises, select flexible materials like willow branches that can be bent without breaking. I've seen many gardeners use rigid bamboo that snaps under the weight of climbing roses. Test your frame's stability by applying gentle pressure to each slat before training any canes—if it moves, reinforce it immediately.
Cane Training: The 6-8 inch spacing for ties in Step 4 is crucial for cane health. Too tight, and you'll restrict growth; too loose, and canes will flop. I've found that cotton twine stretches as canes thicken, making it the best choice over rigid materials. When training, always start at the bottom slat and work upward—this creates a strong base for the entire plant. Prune those first 12 inches of side shoots aggressively; I've seen roses with weak stems because gardeners ignored this step.
Pro Tips for Make A Rose Bush Trellis
- The difference between a trellis that lasts and one that collapses under blooms comes down to these key details. I've...
- Material Selection: Wood is my go-to for durability, but if you're going for a more decorative look, wrought iron or ...
- Stake Installation: That 5-degree outward lean in Step 2 isn't just for looks—it creates a natural fan shape that gui...
Frequently asked questions
Got questions about building a rose bush trellis? You’re not alone! Here are answers to the most common concerns—from timing to troubleshooting—to help you create the perfect climbing support for your roses.
When is the best time to install a trellis for roses?
The ideal time to install a trellis is early spring (before new growth starts) or late winter when the ground is workable. If you’re planting bare-root roses, set up the trellis at the same time. For established bushes, install it in early spring to avoid disturbing roots or damaging delicate canes.
Can I use wood or metal for a rose trellis? What’s better?
Both work, but it depends on your needs! Wood (like cedar or redwood) is budget-friendly and blends into gardens, but may rot over time. Metal (galvanized or powder-coated) lasts longer and resists pests, though it can get hot in the sun. For a rustic look, wood wins; for durability, metal is the champ.
How do I train roses to climb a trellis without damaging the canes?
Gently tie (not wrap) canes to the trellis with soft plant ties or twine, spacing them 6–12 inches apart. Avoid tight knots—use a figure-eight loop to prevent bruising. Prune back any canes that rub against the trellis to keep them healthy. Patience is key! Roses climb best when guided gradually over weeks.
My trellis is leaning—how do I fix it?
If your trellis sags or tilts, check the stakes or anchors first. Drive them deeper into the soil or add horizontal supports (like crossbars) for stability. For freestanding trellises, bury the base at least 6 inches deep or use concrete footings for heavy structures. If using wire, ensure it’s taut and secured to sturdy posts.
What if my roses aren’t climbing? How can I encourage them?
Not all roses are climbers—check your variety! Climbing roses (like ‘New Dawn’ or ‘Blaze’) naturally twine, while ramblers need gentle coaxing. If yours aren’t climbing, try:
- Pruning to 3–5 main canes to focus energy upward.
- Using a lightweight trellis (like a wire arch) to reduce resistance.
- Fertilizing with high-phosphorus food to boost flowering and growth.
Wrapping up and next steps
Building a rose bush trellis is a rewarding project that adds both beauty and structure to your garden.
With the right materials—like sturdy wood, metal, or PVC—and a few simple steps, you’ll create a lasting support for your climbing roses to thrive. Don’t let perfection hold you back—start small, experiment, and enjoy the process!
Now that you’re ready to build, grab your tools and get growing! Next, plant your roses and watch them climb with confidence—your trellis will transform your garden into a stunning, vertical masterpiece. 🌹✨