
Pruning
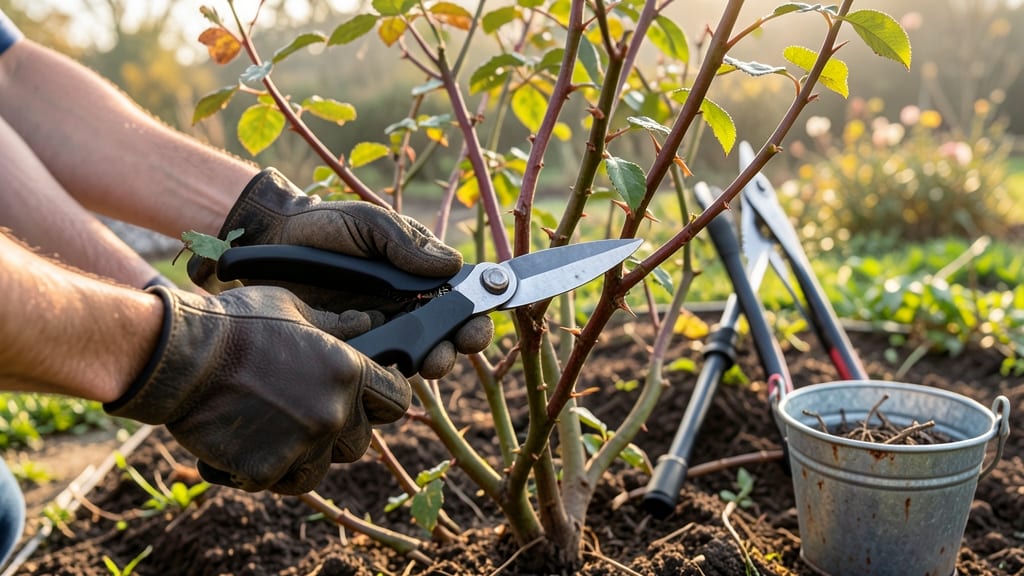
Trimming back rose bushes in fall isn’t just about cutting back—it’s about setting up next year’s blooms while protecting your bushes from winter. ✂️ I used to dread this task, but once I mastered these 3 key cuts, my roses came back stronger every spring, with fewer dead branches and more vibrant growth.
The secret timing is after your first hard frost but before heavy freezes—usually late November in most zones.
You'll need just a few tools: sharp bypass pruners, loppers for thicker stems, and rubbing alcohol to sterilize between cuts. The goal is to remove diseased wood, shape the bush for airflow, and encourage new growth from the base.
I learned the hard way that skipping this step leads to a tangled mess of weak canes by spring—so don't skip it!
After pruning, you'll notice how much cleaner your roses look, with fewer crowded stems competing for sunlight. The cuts you make now determine how many buds will form in spring, so take your time.
For hybrid teas, aim for 3-5 strong canes per bush, while floribundas can handle more. The payoff? Roses that bloom earlier and last longer.
Works for all rose types—just adjust the severity based on your climate. In colder zones, add extra mulch after pruning, while milder areas can wait until early winter. Here's how to do it right the first time.
📚 In This Guide
- What you need
- Instructions
- Tips and common mistakes
- Wrapping up and next steps
What you need
- ● Bypass pruners: Sharp, clean, and disinfected (1 pair). Avoid dull tools—they crush stems instead of cutting cleanly!
- ● Loppers: For thicker stems (½”–1½” diameter). Choose bypass-style loppers for precision (1 pair).
- ● Hand saw: For stubborn, thick canes (1–2, depending on bush size). A pruning saw with a curved blade works best.
- ● Gloves: Heavy-duty, cut-resistant gloves (1 pair) to protect your hands from thorns and debris.
- ● Disinfectant: 70% isopropyl alcohol or a 10% bleach solution (1 small bottle/spray) to sterilize tools between cuts.
- ○ Garden twine or zip ties: (Optional) To secure large branches during trimming (1 roll).
- ○ Pruning sealant: (Optional) For large cuts on hybrid teas or climbers to prevent disease (small jar).
- ● Wheelbarrow or bucket: To collect pruned branches and debris (1–2).
- ● Rake or leaf blower: For clearing fallen leaves and debris after trimming.
- ● Safety glasses: If working near your face or eyes (1 pair).
- ● Knee pads: For comfort if you’re on the ground for a while (1 pair).
- ● Check the weather forecast—trim on a dry, cool day (50–65°F) to avoid stressing the plant.
- ● Have a clear workspace: Remove weeds, rocks, or obstacles around the bush.
- ● Review your rose variety’s pruning needs (e.g., hybrid teas vs. shrub roses may require different cuts).
- ○ Gather a sharpie or marker (optional) to label branches if you’re experimenting with pruning techniques.
Step-by-Step instructions for trimming back rose bushes in fall
Here's how to refresh your roses for next year's bloom—clean cuts that prevent disease and encourage stronger growth.
✂️ Step 1: Remove Dead and Diseased Canes First
Start by identifying canes that are completely brown, mushy, or showing signs of black spot disease. These are your first targets—they won't recover and will only spread problems if left. Use sharp pruners to cut these canes all the way back to the base of the bush, about ¼ inch above a healthy bud or outward-facing growth point.
I always work from the center outward, making it easier to spot hidden damage. If you see any cankers (sunken, discolored spots) on the remaining wood, cut 6 inches below the affected area to ensure you remove the entire infected section. This is the moment that matters: removing these canes now prevents winter rot and gives your plant a clean slate for spring.
✂️ Step 2: Thin Out Crowded Canes for Better Airflow
Next, focus on the remaining healthy canes. Roses thrive with good airflow, so aim to keep 3-5 of the strongest, most vigorous canes per bush. Remove any weak, thin, or crossing canes at their base, cutting just above an outward-facing bud. You'll know you're doing it right when you can see light and air moving through the center of the bush.
Real talk: This step feels brutal at first, but trust me—your roses will thank you. I've seen bushes that looked overcrowded in fall grow into lush, flowering powerhouses in spring because we gave them room to breathe. If you're unsure which canes to keep, choose the ones that are thickest and have the most growth buds along their length.
✂️ Step 3: Cut Back Flowering Canes to Encourage New Growth
For hybrid teas and grandifloras, cut back last year's flowering canes by about ⅓ to ½ their height, leaving 3-5 strong buds on each stem. For shrub roses, you can be slightly more aggressive, reducing height by up to ⅔ if needed. Always make cuts at a 45-degree angle, about ¼ inch above an outward-facing bud.
Here's the thing—this isn't about making your bush look small. It's about redirecting energy. Those cuts tell the plant, "Focus here!" You'll see new, vigorous shoots emerging from the buds you leave behind. If you're unsure where to cut, imagine the bud as the eye of a clock—position your cut just above it, angled away from the center of the bush.
✂️ Step 4: Clean Up and Apply Mulch (Optional)
After trimming, gather all the cuttings and dispose of them properly—don't compost them if disease is present. Wipe down your pruners with rubbing alcohol between cuts to prevent spreading pathogens. Once the bush is tidy, apply a 2-3 inch layer of organic mulch around the base, keeping it 6 inches away from the stem to prevent rot.
This final step protects the roots from freezing temperatures and retains moisture. I like to use shredded bark or straw because they break down slowly and improve soil structure over time. Don't skip this—it's the difference between a bush that struggles in spring and one that bursts with new growth.
Tips & tricks for perfect fall rose pruning
Here's what nobody tells you about fall pruning—these tricks will transform your roses next spring.
Tool Prep is Everything: Before you even touch a cane, sharpen your pruners and wipe them down with rubbing alcohol. Dull blades tear wood, creating jagged cuts that invite disease. I also like to sterilize my tools between each bush if I'm working with multiple plants—this prevents cross-contamination of any lingering pathogens from diseased canes. A small bottle of 70% isopropyl alcohol in your gardening toolkit is a game-changer for clean cuts.
Visual Cues Over Rules: In Step 2, when thinning crowded canes, don't just count to 3-5—look for the "light test." Hold your hand behind the bush and see if you can run your fingers through the center. If you can't, you need more thinning. I've learned this the hard way after seeing roses with too many canes struggle with poor airflow, leading to fungal issues. The goal is to see sunlight reaching the center of the bush.
Angle Matters More Than You Think: That 45-degree angle in Step 3 isn't arbitrary—it's about water runoff. A sloped cut directs rainwater away from the bud, preventing rot. I always imagine a tiny roof protecting each bud. For shrub roses where you might cut more aggressively, maintain this angle even on thicker canes. Pro tip: Use your pruners to make a small notch on the underside of your cut to further encourage water to run off.
Mulch Timing Secret: If you're adding that 2-3 inch layer of organic mulch in Step 4, do it after the first hard frost but before the ground freezes completely. This gives the mulch time to settle and insulate the roots properly over winter. I've found that applying mulch too early can trap moisture and encourage fungal growth before the soil cools down. A good rule of thumb is to wait until your local frost date has passed but before temperatures consistently drop below freezing.
Pro Tips for Trimming Back Rose Bushes In Fall
- Here's what nobody tells you about fall pruning—these tricks will transform your roses next spring.
- Tool Prep is Everything: Before you even touch a cane, sharpen your pruners and wipe them down with rubbing alcohol. ...
- Visual Cues Over Rules: In Step 2, when thinning crowded canes, don't just count to 3-5—look for the "light test." Ho...
Frequently asked questions
Got questions about trimming your rose bushes in the fall? You’re not alone! Here are some of the most common concerns—and straightforward answers—to help you prune with confidence.
When is the exact best time to trim roses in fall?
Trim roses after the first hard frost (when leaves turn brown) but before winter dormancy sets in—typically late October to early November in most U.S. zones. This timing balances disease prevention and winter prep. Avoid trimming too early (active growth can resume) or too late (pruned stems may not harden off).
Do I need to trim roses at all if they’re already dormant?
Yes! Even dormant roses benefit from fall pruning. Trimming back now removes dead or diseased wood, improves airflow (reducing winter rot), and shapes the bush for spring’s fresh growth. Skip it, and you risk pests, fungal issues, or a messy tangle of canes next year. Think of it as a “reset button” for winter!
How much should I cut back—can I trim too aggressively?
For most roses, aim to reduce canes by ⅓ to ½ their height. Hybrid teas and floribundas can be trimmed harder (down to 18–24 inches), while climbers and shrub roses need gentler cuts (leave 3–4 feet). Never cut into old wood (gray/brown stems)—this removes next year’s blooms. If you’re unsure, err on the side of caution and trim less.
Should I disinfect my pruners between cuts?
Absolutely!
Use a 10% bleach solution (1 part bleach to 9 parts water) or rubbing alcohol to wipe blades between cuts. This stops the spread of black spot or bacterial canker. Pro tip: Sterilize tools before and after pruning sessions, and store them in a dry place to prevent rust.
What if my roses look sad after trimming—did I mess up?
Don’t panic! A freshly pruned rose might look sparse, but this is normal. Focus on healthy canes (reddish-brown, flexible) and avoid cutting into bare wood. If you see no green buds on remaining stems, you may have trimmed too late—next year, prune earlier. Mulch well and water deeply to help recovery.
Wrapping up and next steps
Trimming back your rose bushes in fall is a game-changer for next year’s blooms—it’s all about preparing for winter, removing dead growth, and shaping for strength. With the right cuts and timing, you’ll encourage healthier stems, better airflow, and stunning spring rebirth. 🌸
Ready to transform your garden? Grab your pruners and tackle one bush at a time—your future roses (and neighbors!) will thank you. Pro tip: Snap a before-and-after photo to track your progress!