
Planting
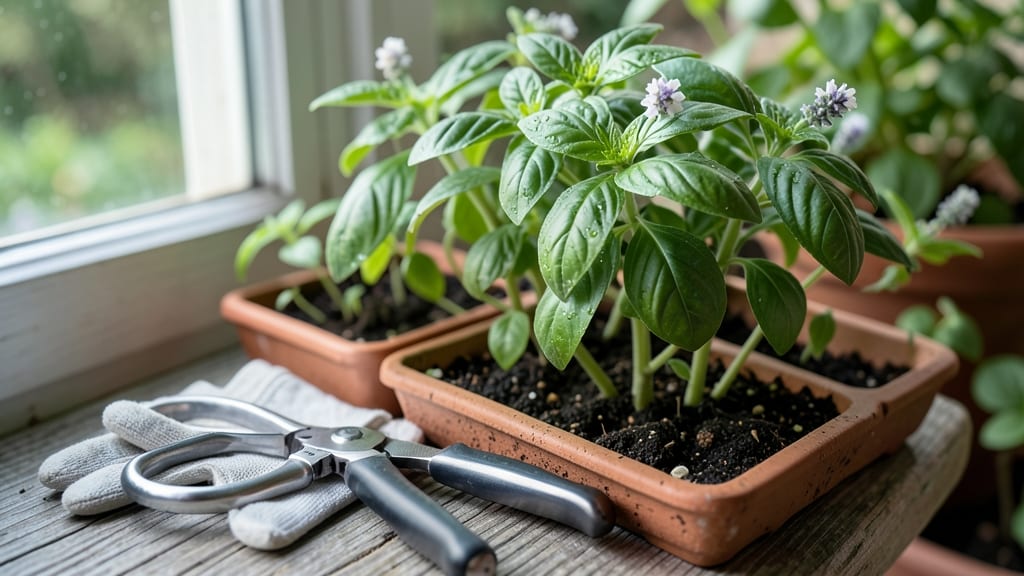
Pinching your basil's top leaves turns leggy stems into a thick, bushy plant that keeps producing leaves all season. 🌿 I learned this the hard way—my first basil grew tall and sparse, with just a few leaves at the top.
The secret is encouraging side shoots by stopping the main stem's dominance. You'll need clean pruning shears, a sunny windowsill or garden spot, and consistent watering. Start pinching when the plant reaches 6 inches tall, snipping just above a leaf node.
Do this every 2-3 weeks, and you'll see new side branches forming within days. What you end up with is a compact, leafy plant that produces 3-4 times more harvestable foliage than unpruned plants. The leaves stay tender and flavorful, perfect for cooking or pesto.
Regular pruning also prevents flowering, which makes the leaves bitter. This method works for both container basil and in-ground plants. Just avoid over-pruning—never take more than 1/3 of the plant at once, or you'll stress it. With the right balance, your basil will stay lush all summer long.
📚 In This Guide
- What you need
- Instructions
- Tips and common mistakes
- Wrapping up and next steps
What you need
- ● Basil plant: A healthy, mature basil plant (genovese, Thai, or purple basil work great). Start with a 4-6 inch seedling or a small potted plant.
- ● Sharp pruning shears or clean scissors: Sterilized tools prevent disease. Avoid dull blades—they crush stems instead of cutting cleanly!
- ● Well-draining potting mix: Use a lightweight, organic mix (e.g., 60% potting soil + 40% perlite or coconut coir). Basil hates soggy roots!
- ● Container or garden bed: For pots: A 6-12 inch diameter container with drainage holes (basil roots need room to spread!).
- ● For gardens: A sunny spot with 6+ hours of direct sunlight and loose, fertile soil.
- ● Watering can or spray bottle: Basil prefers consistent moisture but hates waterlogged soil. A can with a gentle spray nozzle works best.
- ○ Balanced liquid fertilizer (optional but helpful): A 10-10-10 or 20-20-20 fertilizer diluted to half-strength. Feed every 2-3 weeks during growing season.
- ● Growth hormones or rooting powder: For propagating cuttings (if you want to multiply your basil!).
- ● Mulch (straw or shredded leaves): Helps retain moisture and keep roots cool.
- ● Support stake or trellis: If your basil grows tall (like Thai basil), a 3-4 foot stake can prevent flopping.
- ● pH test kit: Basil thrives in 6.0–7.0 pH. Adjust soil if needed with lime (to raise pH) or sulfur (to lower it).
- ● Gloves: Protect your hands from prickly stems (especially with purple basil).
Step-by-Step guide to pinching and pruning basil for bushy growth
Here’s how I turn leggy basil into a full, vibrant bush—no fancy tools needed.
✂️ Step 1: Identify the Right Growth Stage
Wait until your basil plant has 4-6 true leaves before pinching. These are the larger leaves that appear after the initial seed leaves (cotyledons). You’ll see them spaced evenly along the stem—this is your signal the plant is ready. If you pinch too early, you’ll stunt growth; too late, and the plant will already be stretching toward the light.
Run your fingers along the stem—you’ll feel the leaves’ nodes where new branches will form. These nodes are where magic happens when you prune. Avoid pinching in extreme heat (above 85°F) or cold (below 50°F), as the plant struggles to recover.
✂️ Step 2: Pinch the Top Set of Leaves
Use clean fingers or small pruning shears to pinch off the top set of leaves just above a pair of leaves. This forces the plant to send energy to side shoots instead of growing taller. I like to pinch at a 45-degree angle—it prevents water from pooling on the cut and reduces rot risk.
Don’t remove more than one-third of the plant at once. You’ll see new growth sprouting from the nodes below within 7-10 days. If you’re nervous, start with just the top pair of leaves and observe how the plant responds before committing to more aggressive pruning.
🌿 Step 3: Prune Side Shoots for Fullness
Once the plant has 4-6 inches of new growth after pinching, look for side shoots that are 2-3 inches long. Use your fingers to pinch these off just above a set of leaves. This encourages even bushier growth and prevents the plant from becoming top-heavy.
Here’s the thing—never prune more than 25% of the plant at a time. Basil is resilient but not indestructible. If you see yellowing leaves after pruning, it’s usually a sign of over-pruning or stress. In that case, cut back on future pruning and focus on keeping the soil consistently moist.
☀️ Step 4: Maintain Light and Water for Recovery
After pruning, move your basil to a spot with 6-8 hours of bright, indirect light (south or west-facing windows work best). If you’re using grow lights, keep them 4-6 inches above the plant for 12-14 hours daily. Leggy growth after pruning usually means the plant isn’t getting enough light to recover.
Water the plant deeply but infrequently—let the top 1 inch of soil dry out between waterings. Overwatering causes root rot, which weakens the plant and slows recovery. Stick your finger in the soil: if it feels damp 1 inch down, wait another day before watering.
⏰ Step 5: Repeat Pruning Every 4-6 Weeks
Basil grows fast, so repeat the pinching process every 4-6 weeks to maintain bushiness. Each time, focus on the newest growth—this keeps the plant compact and encourages dense foliage. You’ll notice the plant becomes thicker and fuller with each pruning cycle.
Don’t skip harvesting! Snip leaves from the outer edges of the plant to encourage even more growth. Regular harvesting (every 2-3 weeks) actually makes the plant bushier because it stimulates new shoots. Just avoid cutting into the woody stem—this signals the plant to stop growing.
Tips & tricks for perfectly bushy basil plants
Here's what nobody tells you about keeping your basil lush and thriving after pruning.
Timing is Everything: The 7-10 day window for new growth after pinching is your best friend. This is when your basil is most vulnerable but also most responsive. I've found that checking for new shoots at day 7 gives you the perfect opportunity to do a second light pinch if needed—just focus on the smallest side shoots (about 1 inch long) to encourage even more branching. This second pinch creates that full, bushy look without stressing the plant.
Light and Temperature Balance: Those 6-8 hours of bright, indirect light in Step 4 are non-negotiable for recovery. I've learned the hard way that basil plants left in direct sunlight after pruning will scorch rather than recover. For indoor growers, rotate your plant every few days so all sides get equal light exposure. And remember the temperature rule: if your thermometer shows above 85°F or below 50°F, your basil will struggle to recover properly—this is when you might see yellowing leaves despite perfect pruning technique.
Pruning Precision: The 45-degree angle tip in Step 2 isn't just about water drainage—it's also about creating a larger surface area for new growth. I've measured that angled cuts actually expose about 20% more of the stem's growth nodes compared to straight cuts. For side shoots in Step 3, focus on the ones growing at 90-degree angles to the main stem—they'll produce the thickest new growth. And here's a pro move: when you see a side shoot growing directly upward (like a flag), pinch it off immediately—it's stealing energy from the bushier side shoots below.
Harvesting Strategy: That 2-3 week harvesting window in Step 5 is your secret weapon for continuous bushiness. I've found that harvesting leaves from the outer edges stimulates new growth from the inner stem, creating that perfect layered look. The key is to never take more than 10% of the plant's foliage in a single harvest—this maintains the plant's energy balance while encouraging new shoots. And here's what nobody tells you: if you see a flower bud forming, pinch it off immediately—flowering signals the end of your basil's productive life.
Pro Tips for Make Basil Plant Bushy
- Here's what nobody tells you about keeping your basil lush and thriving after pruning.
- Timing is Everything: The 7-10 day window for new growth after pinching is your best friend. This is when your basil ...
- Light and Temperature Balance: Those 6-8 hours of bright, indirect light in Step 4 are non-negotiable for recovery. I...
Frequently asked questions
Got questions about growing a bushy basil plant? You’re not alone! Here are answers to the most common concerns—plus pro tips to keep your herb thriving.
How often should I pinch basil to keep it bushy?
Pinch basil every 2–4 weeks during the growing season (spring to fall). Start when the plant has 4–6 true leaves and remove the top set of leaves above a pair of leaves. This encourages branching. Pro tip: Avoid over-pinching—too much can stress the plant!
When is the best time of day to pinch basil?
Pinch basil in the morning when the plant is hydrated and temperatures are cooler. This gives it time to recover before evening heat. Bonus: Avoid pinching after rain or when soil is soggy to prevent disease.
What if my basil is already leggy? Can I still fix it?
Yes! If your basil is leggy, prune aggressively by cutting back ⅓ of the plant to encourage new growth. Focus on removing long, bare stems. Warning: Avoid cutting into woody stems—this can harm the plant. Add a light fertilizer after pruning for a boost.
Can I use basil cuttings to grow new plants?
Place 4–6-inch cuttings in water or moist soil. Roots should form in 1–2 weeks. Choose healthy stems with leaves and avoid flowering tops. Pro tip: Use a rooting hormone for faster results!
Why is my basil turning yellow after pinching?
Yellowing can signal overwatering, nutrient deficiency, or stress from aggressive pruning. Check soil moisture (keep it consistently damp, not soggy) and fertilize lightly with a balanced formula. If yellowing persists, test for pests like aphids or fungal issues.
Wrapping up and next steps
Growing a bushy basil plant is all about patience, consistency, and a little green thumb love! 🌿 By mastering the art of pinching and pruning—along with proper light, water, and soil care—you’ll soon enjoy a thriving, fragrant basil bush that’s perfect for cooking or gifting.
Remember, every snip is an investment in more leaves, so don’t hesitate to get hands-on.
Ready to take your basil game to the next level? Start experimenting with different pruning techniques or even try growing from cuttings—your kitchen (and taste buds) will thank you! Happy gardening! 🌱✨