
Planting
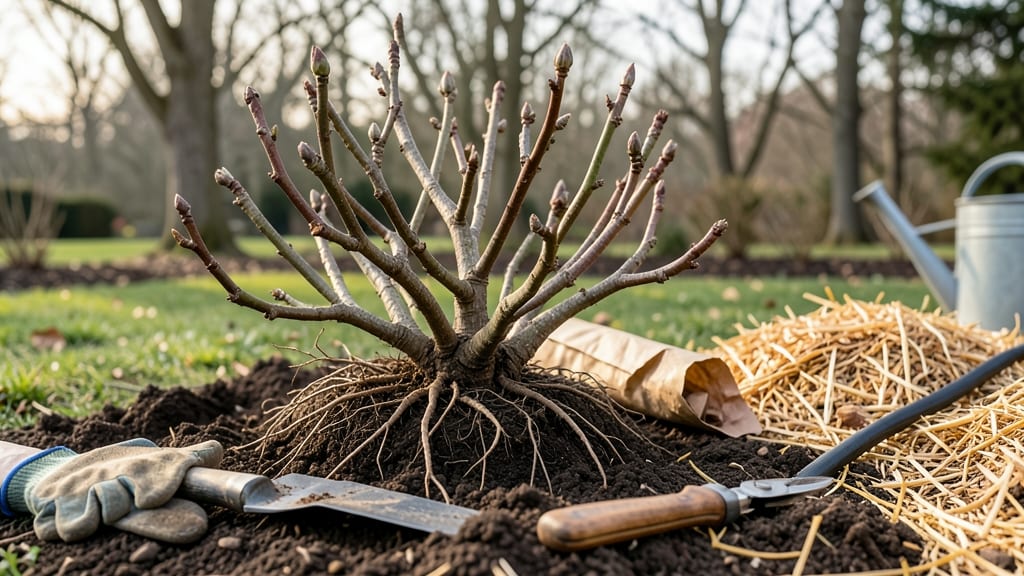
Fall is the perfect time to move that rose bush—transplant rose bush in fall gives roots time to settle before winter’s chill sets in. 🌿 I’ve learned the hard way that rushing this process leads to weak canes and stunted blooms next spring, but doing it right means a stronger plant by next summer.
The key is timing: aim for 4-6 weeks before your first frost, when soil stays warm enough for roots to knit together. Dig a hole twice as wide as the bush’s root ball but no deeper—roses hate soggy feet.
Amend the soil with compost to improve drainage, and prune back any damaged canes by a third to reduce stress.
Water deeply right after transplanting, then keep the soil moist but not soggy for the first two weeks. Mulch around the base with 2-3 inches of organic material to insulate roots and retain moisture.
By spring, your rose will reward you with vibrant new growth and a fuller bloom cycle.
This method works for USDA Zones 4-9, but adjust timing slightly in colder regions—wait until soil temps dip to 50°F at night. The secret? Patience. A well-transplanted rose in fall becomes a showstopper the following season.
📚 In This Guide
- What you need
- Instructions
- Tips and common mistakes
- Wrapping up and next steps
What you need
- ● Garden trowel or spade – A sturdy, sharp-edged tool (6–8 inches deep) for digging.
- ● Pruning shears or loppers – For trimming dead or damaged stems (sterilize blades with rubbing alcohol!).
- ● Garden hose or watering can – With a gentle spray nozzle for thorough hydration.
- ● Burlap or transplant fabric – 3–4 feet wide, to wrap roots and protect them during transport.
- ● Compost or well-aged manure – 2–3 gallons per bush to enrich the new soil.
- ● Mulch (pine straw, shredded bark, or wood chips) – 2–3 inches thick to insulate roots.
- ● Organic fertilizer (balanced, 10-10-10 or rose-specific) – 1–2 pounds per bush for post-transplant nourishment.
- ● Garden gloves – Heavy-duty to protect hands from thorns and soil.
- ● Root stimulator gel or powder – Speeds up root regrowth (follow label instructions!).
- ● Soil test kit – Ensures your new planting spot has the right pH (roses love 6.0–6.5).
- ● Epsom salt (magnesium sulfate) – 1 tablespoon per gallon of water for a post-transplant boost.
- ● Wheelbarrow or dolly – For hauling soil, mulch, or heavy bushes with ease.
- ● Staking kit (stakes + soft ties) – If your rose is tall or top-heavy, secure it temporarily.
Instructions for transplanting rose bushes in fall
Fall relocation is the secret to roses thriving next season—here's how to do it right.
🪴 Step 1: Prepare the New Location
Choose a spot with 6+ hours of sun daily and room for the bush to grow to its mature size. Roses need excellent drainage, so dig a hole twice as wide as the root ball but only as deep as the root system—no deeper or the plant will sit too low. I always test drainage by filling the hole with water; if it doesn't drain within 30 minutes, amend the soil with 2-3 inches of compost or sand.
Loosen the soil at the bottom of the hole with a garden fork to encourage root spread. If your soil is heavy clay, mix in 1 part native soil to 1 part compost—this improves aeration and moisture retention without overwhelming the roots. Avoid fresh manure; it burns tender roots and attracts pests.
✂️ Step 2: Prune and Dig Up the Rose Bush
Two weeks before moving day, give your rose a light pruning—cut back any dead or crossing branches to reduce stress. On transplant day, water the bush deeply the night before so the soil is moist but not soggy. Dig a trench around the root ball, working your shovel 12-18 inches away from the stem to avoid damaging the main roots. I find a sharp spade works best for clean cuts.
Gently loosen the roots with your hands or a fork, teasing them apart if they're circling tightly. For established bushes, you might see roots growing in all directions—this is normal. Once the root ball comes free, wrap it in a burlap sack or damp towel to keep the roots moist during transport. If you're moving more than 50 feet, keep the roots covered and shaded.
💧 Step 3: Plant the Rose Bush in Its New Home
Place the rose in the prepared hole so the top of the root ball sits 1-2 inches above soil level. This prevents the graft union (the swollen bump near the base) from being buried, which can cause the plant to produce wild shoots. Fill the hole with native soil, tamping down gently as you go to eliminate air pockets. Water thoroughly until the soil settles and the hole is completely filled.
Spread 2-3 inches of mulch around the base, keeping it 3 inches away from the stem to prevent rot. I use shredded bark because it breaks down slowly and improves soil structure over time. Avoid piling mulch against the trunk—this traps moisture and invites disease. Water deeply one last time to help the roots settle into their new home.
☀️ Step 4: Care for the Rose After Transplanting
Keep the soil consistently moist but not waterlogged for the first 4-6 weeks. You'll know it's right when the top 2 inches of soil feel damp but not soggy. Avoid fertilizing until spring—new roots need time to establish without competing with vigorous top growth. If your area experiences hard frosts, wrap the bush in burlap or frost cloth to protect it through winter.
Watch for new growth in spring—that's your sign the transplant took. If you see yellowing leaves or wilting, it might mean the roots are struggling. In that case, water more deeply or check for drainage issues. With proper care, your rose will bloom beautifully next season, stronger than ever.
Tips & tricks for transplanting rose bushes in fall
Fall is the perfect time to move your roses—here's how to avoid common pitfalls and give your plants the best chance for success.
Drainage Test: That 30-minute drainage test in Step 1 is non-negotiable. If water pools after 30 minutes, you'll need to amend the soil more aggressively—consider adding a layer of gravel at the bottom of the hole before planting. I've seen roses fail within weeks when planted in poorly draining soil, no matter how carefully you handle the roots.
Root Ball Handling: When loosening roots in Step 2, think of them like a delicate network—tease them apart gently rather than pulling. Circular roots (called "root bound") are common in container-grown roses. If you find them, make a few vertical cuts with a clean knife to encourage outward growth. This helps the roots spread properly in their new home.
Graft Union Protection: That 1-2 inch height above soil level in Step 3 is crucial for maintaining the rose's variety. The graft union (where the rose was attached to its rootstock) should never be buried—this causes the plant to revert to wild shoots. Mark the union with a piece of tape if needed to remind yourself during planting.
Post-Transplant Care: The 4-6 week watering window in Step 4 is your best friend. Use a moisture meter to check soil dampness—it should read between 40-60% moisture. Overwatering is just as harmful as underwatering, especially in fall when days grow shorter. A soaker hose buried near the roots keeps moisture consistent without wetting the foliage, which helps prevent fungal diseases.
Pro Tips for Transplant Rose Bush In Fall
- Fall is the perfect time to move your roses—here's how to avoid common pitfalls and give your plants the best chance ...
- Drainage Test: That 30-minute drainage test in Step 1 is non-negotiable. If water pools after 30 minutes, you'll need...
- Root Ball Handling: When loosening roots in Step 2, think of them like a delicate network—tease them apart gently rat...
Frequently asked questions
about transplanting rose bushes in the fall—because even pros need a little guidance! Here are answers to the most common queries to help you ace your rose relocation.When is the exact best time to transplant roses in fall?
Transplant roses 4-6 weeks before your first hard frost—typically late September to early November in most U.S. zones. This gives roots time to establish before winter dormancy. Pro tip: Check your local frost dates for precision!
Can I transplant roses in late fall or early winter?
Nope! Avoid transplanting when temps drop below 40°F (4°C). Late fall/early winter transplants risk shock or frost damage. If you missed the window, wait until early spring (before buds swell).
What if my rose bush is already flowering? Should I wait?
Yes! Stop flowering by pruning blooms and seed pods to redirect energy to root growth. Fall-blooming roses (like ‘Knock Out’) may need a second transplant in spring—plan ahead!
How do I know if my transplanted rose is struggling?
Watch for wilted leaves, yellowing foliage, or sparse new growth. These could signal root shock. Fix it: Water deeply (1-2 inches), mulch heavily, and avoid fertilizing until spring. Most roses bounce back!
Can I transplant a rose bush from a container or pot?
Container-grown roses transplant easier than bare-root ones. Just water thoroughly 1-2 days before moving to reduce stress. Gently loosen roots and plant at the same depth as the container.
What’s the best soil mix for transplanting roses?
Use a well-draining blend of native soil (60%), compost (30%), and perlite/sand (10%). Roses hate soggy roots! Amend heavy clay or sandy soil to improve moisture retention and aeration.
Wrapping up and next steps
Transplanting your rose bush in the fall can set the stage for a vibrant, resilient plant next spring—if done with care!
By choosing the right timing, preparing the soil, and handling the roots gently, you’ll give your roses the best shot at thriving through winter. Don’t let fear of failure hold you back—your green thumb is closer than you think!
Now that you’re equipped with the know-how, roll up your sleeves and get moving. Pick a calm, cool day, gather your tools, and give your roses the fresh start they deserve. Ready to dig in? Your future blooms will thank you! 🌹✨